Set up your KLARA cash register
Select your checkout or payment terminal below and follow the step-by-step instructions.
Select the desired instructions
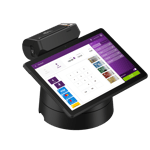
Instructions Cash Register Flex
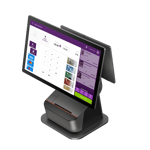
Instructions Cash Register Duo
KLARA POS Desk instructions
KLARA POS Mobile instructions
KLARA POS Mobile Mini instructions
Connection printer with cash register
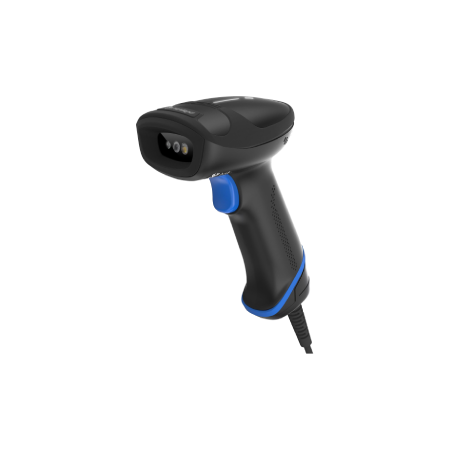
Connect POS with scanner
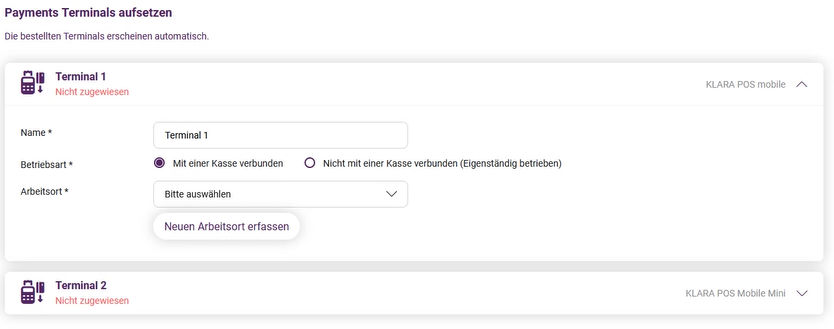
Connection between payment terminal and cash register
To the FAQ

Set up your Flex cash register in just a few steps
Thank you for choosing our Flex cash register. Let's get started right away! 🚀
Overview of steps
Scope of delivery
1x Rotatable charging station
1x power cable + power supply unit
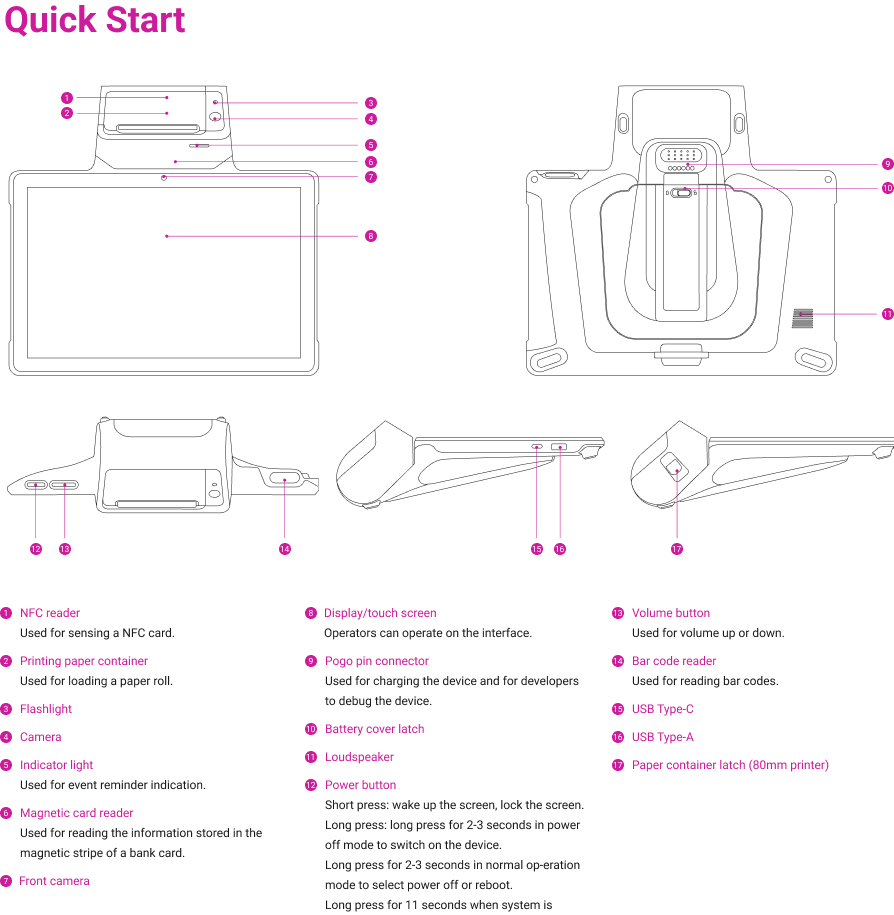
Step 2: Connect the charging station
Step 3: Place the cash register on the charging station
Step 5: switch on the device
Step 6: begin setup
- Sign in with your Google account. If you do not yet have a Google account, you can create one during the process
Step 7: connect your cash register to the KLARA app
Once you have successfully logged in with your Google account, it's time to connect your new cash register to the KLARA app.
Is the KLARA cash register app not yet installed on your cash register? Open the Google Play Store app ![]() , search for the KLARA POS app and download it.
, search for the KLARA POS app and download it.
.png?width=450&height=281&name=Bild%20(3).png)
Transfer this code to the KLARA checkout app.
.png?width=450&height=281&name=Bild%20(4).png)
7.4 At the end, you can choose between the restaurant or store mode.
Catering business (restaurant, bar, etc.) with order assignment of the courses to specific tables and/or take-away mode and connection of several (also external) printers possible
Store mode: You sell items or services and require neither take-away functions nor table orders and a maximum of 1 printer.

Set up your Duo cash register
Thank you for choosing our Duo cash register. Let's get started right away! 🚀
Overview of steps
Scope of delivery
9x paper rolls for receipt printer
Step 5: connect your cash register to the KLARA app
Once you have successfully logged in with your Google account, it's time to connect your new cash register to the KLARA app.
Is the KLARA cash register app not yet installed on your cash register? Open the Google Play Store app ![]() , search for the KLARA POS app and download it.
, search for the KLARA POS app and download it.
.png?width=450&height=281&name=Bild%20(3).png)
Transfer this code to the KLARA checkout app.
.png?width=450&height=281&name=Bild%20(4).png)
5.4 At the end, you can choose between restaurant or store mode.
Restaurant mode: For catering businesses (restaurants, bars etc.), with table ordering and/or take-away, supporting multiple printers.
Store mode: For retailers selling items/services; no table or take-away functions etc.
Everything your business needs
The KLARA business software has a modular structure. You can flexibly activate individual software modules at any time according to your needs.
Swiss support
All-in-one
Ready to go immediately
.png?width=363&height=245&name=Group%205%20(1).png)
Accounting
With accounting, customer management & archive Lorem ipsum dolor sit amet, consetetur sadipscing elitr, sed diam nonumy eirmod tempor invidunt ut labore et dolore
learn more
Payroll accounting
With accounting, customer management & archive Lorem ipsum dolor sit amet, consetetur sadipscing elitr, sed dia
learn more
.png?width=346&height=238&name=Group%206%20(1).png)
Cash register system
With accounting, customer management & archive Lorem ipsum dolor sit amet, consetetur sadipscing elitr, sed diam nonumy eirmod tempor invidunt ut labore et dolore magna aliquyam
learn more
Get started for free and take the administration
your business to a new level.
KLARA Experience Day 2022
We present the new " 360 degree office experience "
New offer model from January 1, 2023
We will discontinue the old free core offering as of December 31, 2022

Start with the Desk payment terminal
Scope of delivery
1x cable and country-specific mains adapter for charging

1x Ethernet cable
Step 1: Unpacking and checking the device
Step 2: Connect the device
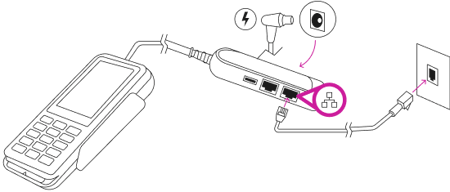
Step 3: Switch on the device
Step 4: Establish a network connection
Make sure that the other end of the Ethernet cable is connected to an active network connection.
Step 5: Connect the terminal to your cash register

Start with the Mobile payment terminal
Scope of delivery
1x USB power plug
Step 1: Unpacking and checking the device
Step 2: Switch on the device
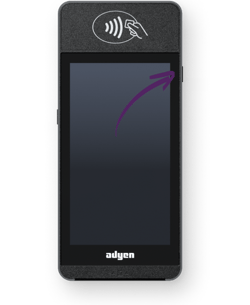
Step 3: Establish a WLAN connection
Step 4: Connect the terminal to your cash register

Start with the Mobile payment terminal
Scope of delivery
1x USB power plug
Step 1: Unpacking and checking the device
Step 2: Switch on the device

Step 3: Establish a WLAN connection
Step 4: Connect the terminal to your cash register

Start with the Mobile Mini payment terminal
Scope of delivery
1x USB power plug
Step 1: Unpacking and checking the device
Step 2: Charge the terminal
Connect the terminal to a power source. Charge the battery for at least four hours while you continue with the next steps.Step 3: Switch on the device
Step 4: Establish a Wi-Fi connection
Step 5: Connect the terminal to your cash register
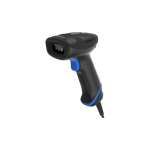
Connect POS with scanner
Choose your scanner version:
Bluetooth Barcode Scanner
USB Barcode Scanner
Bluetooth Barcode Scanner
Step 1: Unpack and connect the device
Open the box, take out the scanner and the battery, and insert the battery into the scanner.
If the battery is empty, take the stand and the USB cable from the box, connect the stand to a USB port, and place the scanner on it.
Wait until the battery is fully charged.
Step 2: Connect to your KLARA POS
On your POS, open the KLARA app and go to Settings.
Select Devices, then Scanner. Your new scanner will appear as HR2300 + serial number. Tap Add scanner to connect the device.
💡 Tip: Sometimes the scanner isn’t found on the first try. Try again and make sure it’s not already connected to another device.
Now continue with Step 3: Function test.
USB Barcode Scanner
Step 1: Unpack and connect the device
Open the box, take out the scanner and the USB cable.
Insert the RJ-45 plug firmly into the socket on the scanner (you should hear a click), then connect the USB plug to a free USB port on your POS.
⚠️ Note: When using the KLARA POS Flex, the USB scanner only works if the POS is placed on its stand.
Step 2: Connect to your KLARA POS
The scanner connects automatically as soon as it’s plugged in via the USB cable.
Step 3: Function test
Open the POS and scan a barcode. The POS should react.
If nothing happens:
Try a different barcode. Switch to an app with a text input field (e.g. Chrome browser), place the cursor in the field and scan the barcode. The scanned text should appear in the input field.
If you’re using a cable connection:
- Check that the cable is properly clicked into place.
- Try another USB port.
Do you want to scan barcodes that include German umlauts or French accents?
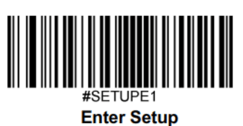
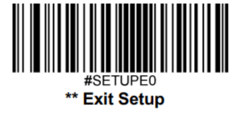
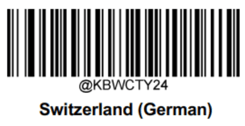
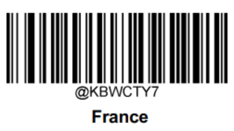
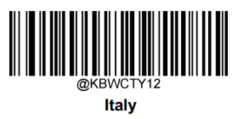
You scan lots of barcodes and don’t want to scan manually every time?
- Set up the scanner stand so you can comfortably hold your items underneath it.
2. Place the scanner on the stand.
3. The scanner automatically switches to automatic mode.
4. Hold an item under the scanner.
5. The scanner automatically scans the barcode.
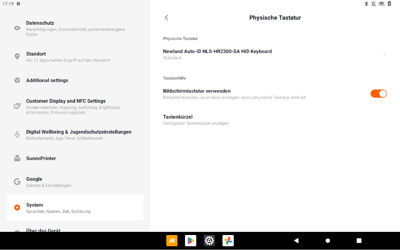
⚠️ Important: The scanner is recognized as a keyboard.
If the on-screen keyboard no longer appears, open the Settings app and go to System > Languages & Input > Physical Keyboard, then enable Show on-screen keyboard.
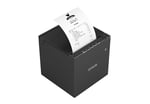
Connection of receipt printer with cash register
Go to Settings in the KLARA POS app and tap "Connect receipt printer".
Click on "Search receipt printer" and select the receipt printer as soon as it has been found. TIP: The name of the receipt printer starts with 'TM-30'.
Once the receipt printer has been found, the app also searches for other devices. You can select the receipt printer as soon as it appears on the screen.
If you are using a different cash register, you must call up the print settings of your cash register and search for and connect the receipt printer there.

Connection between payment terminal and cash register
Nice that you have chosen one of our payment terminals, let's connect the terminal to the cash register 🚀
Connect the terminal to your KLARA cash register Duo or Flex
Step 1: Prepare the device
Step 2: Connect the cash register

General questions about our POS systems
In this case, you are welcome to contact our support team. They will contact you as soon as possible and help you further.
- Ensure that WLAN is activated and the correct network has been selected.
- Make sure that the plugs are plugged in correctly.
- Restart the terminal / cash register.
Make sure that the battery is charged or the device is connected to the power supply.
With the Flex cash register: Check that the device is correctly engaged in the charging station.
Carry out a test sale and observe whether the payment request appears correctly on the terminal. Important: As soon as the amount appears on the terminal, you can cancel the test sale, otherwise the credit card used will be charged.
If the sale is completed anyway, check whether it was successful. Was the amount charged (see credit card app/push message) and is there a message on both the terminal and the checkout that the payment was successful? Then the terminal is communicating correctly with your cash register.
Make sure that the terminal ID and checkout software settings are stored correctly.
When connecting via network: Check whether both devices are in the same network.
- Check the network connection of both devices.
- Restart both devices.
Open Settings - Network - and change the network settings of your terminal.
Are you logged in to KLARA and can't see your terminal in the settings? Contact our support team, we will be happy to help you.
If you have any difficulties with the setup, you can find help in our support area. Alternatively, you can arrange a set-up meeting with us.
Yes, in principle this is possible if the terminal is operated standalone (independently).
Klara POS Duo and Flex: Go to the Android system settings: Display > Brightness or Sound & vibration > Volume.
Both payment terminals:
Settings > Display > Brightness or Settings > Volume (if available).
Yes, all our devices receive regular updates. These are installed automatically as long as the device is connected to the Internet.
Terminal menus
1. Settings and 2. Transactions
Menu options Settings
| Device information | Display model, serial number, IP address, software version, configuration version, dealer account and store details |
| Network | Configure network connections and activate/deactivate flight mode |
| Configuration | Display, update or remove configuration version |
| Display | Adjust screen brightness |
| Diagnostics | Perform network connection tests or send diagnostic reports |
| Apps | Overview of installed apps and certificates |
| Restart terminal | Settings > Power supply |
Menu options Transactions
| History | View saved transactions |
| Totals report | View and reset transaction totals report |
| New transaction | Refund, MOTO payment, MOTO refund, manual card entry |
Display device information
To view information about your terminal: Go to Settings > Device info
You will see: Model, Serial number, IP address, Current software version, Configuration version, Associated dealer account and store, Store address,
Display and reset totals
Display and reset totals
How to get the total amount report:
- Select Transactions > Totals in the menu.
- Enter the password for the transaction menu.
- Now you can:
- View the total report for the period at the top of the report.
- Start a new reporting period by tapping the reset button.
- Call up the report from the previous period.
Note: The reset can also take place automatically - e.g. according to a set schedule (if configured to do so).
Flight mode aktivieren✈️
Go to "Settings > Network". Enter the passcode. Activate the flight mode switch. All connections (WLAN, Bluetooth, mobile radio) are now deactivated.
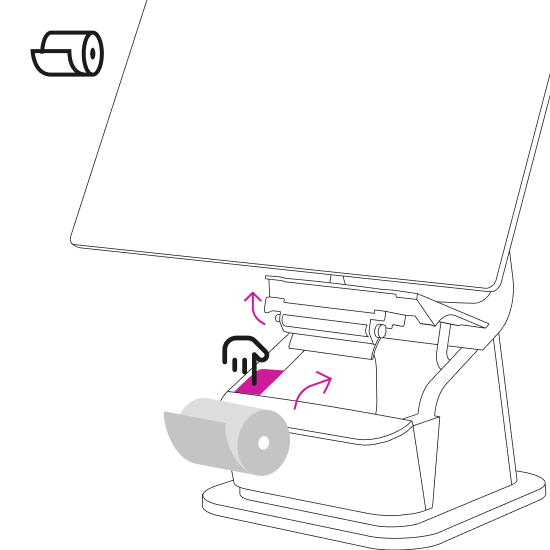
KLARA POS Duo and Epson TM-30 printer
If you need new paper rolls for your 'Epson TM-30' receipt printer or your KLARA POS Duo, the easiest way is to order them from one of the following online stores:
The 'Epson TM-30' needs thermal rolls: Diameter 80 mm, length 80 meters, core 12 mm.
KLARA cash register Flex
The KLARA POS Flex requires a thinner thermal roll: 80 mm wide, 15 m long, 12 mm core diameter.
This can be ordered online or from our support team.
Please check your terminal regularly to prevent tampering or misuse:
- Look out for indications such as "TAMPER" or "TAMPERED" (tampered, falsified) - in this case, take the device out of operation immediately and contact our support team
- Check for tampering (e.g. additional devices, cables, stickers or damage to the card reader, display, keypad).
- PIN entry must be protected from the view of customers and cameras.
We at KLARA NEVER send technicians to your home unasked or unannounced. Always report suspicious incidents to your supervisor. In case of doubt, if something is suspicious, you can also contact us directly.
In general, be alert to unusual behavior around payment terminals - e.g. if unknown persons try to open or unplug devices.
Always report suspicious incidents to us via your line manager or security officer. If in doubt, you can also contact us directly.
If you discover that a KLARA payment terminal is missing or has been stolen, proceed as follows:
1. log on to your computer at app.klara.ch and deactivate the branch under 'Cash register system -> Branch' or if you have several cash registers, a single cash register under 'Cash register system -> Cash register'.
2. now open our support form and provide us with the following information:
- Which model and which serial number does the missing terminal have?
- Where exactly was the terminal lost or stolen?
- Was the terminal already in use or still in its original packaging?
Do you still need accessories?
Of course, you can also order additional charging stations, a separate barcode scanner, a cash drawer and much more from us. Take a look at our checkout store.
Administer
Your administration is done at the click of a mouse - say goodbye to paperwork.
Be known
You inspire with your online presence and win new customers.
Sell
From quotation to invoicing, everything under control - increase your sales.
Retain customers
Systematically bind your customers to you and turn them into fans.




.png?width=794&name=startups-ch_Logo_RGB_Web%20(1).png)


.png?width=137&name=MicrosoftTeams-image%20(11).png)


